
Deliteful Tutorial (Part 6) - Adding a Details View
In the previous step of the deliteful tutorial we enhanced the display of our photo list view. We will now add a second view that shows the details of a photo. The details view will appear when we select one of the items in the photo list.
If you have chosen to get the tutorial application from the
ibm-js/deliteful-tutorialproject, switch to thepart6branch now:$ git checkout part6
Markup and CSS
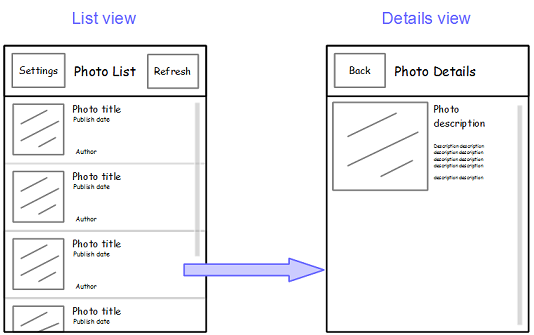
As we have seen previously or main view is made of a toplevel d-view-stack component which, so far,
contains only one view (the list view). The new details view will be added to this view stack,
so it can replace completely the list view:
<!-- page content -->
<d-view-stack class="width100 height100" id="vs">
    <d-linear-layout id="listView">
        ...
    </d-linear-layout>
    <!-- details view -->
    <d-linear-layout id="detailsView">
        <!-- page content header -->
        <d-linear-layout vertical="false" class="pageHeader">
            <div>
                <button is="d-button">Back</button>
            </div>
            <div class="fill titleStyle">Photo Details</div>
        </d-linear-layout>
        <!-- page content -->
        <div id="photoDetails" class="fill"></div>
    </d-linear-layout>
</d-view-stack>
The details view contains a header (implemented using a d-linear-layout, we are familiar with this already),
and a simple div that will contain the photo details.
Let's also add a little rule in css/app.css to set a margin on the details div and allow vertical scrolling on it:
#photoDetails {
    margin: 9px;
    overflow-y: auto;
}
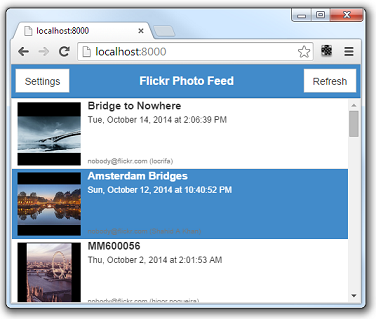
As we will rely on the List's selection to show the details view, we must set the List's selectionMode so that
items can be selected:
<d-list ... selectionMode="single">
JavaScript
Add this code to js/app.js:
photolist.on("selection-change", function (event) {
    var renderer = event.renderer;
    if (renderer && renderer.item) {
        document.getElementById("photoDetails").innerHTML =
            renderer.item.description.replace(/href=/ig, "target=\"_blank\" href=");
        vs.show(detailsView);
    }
});
This code adds a selection-change event handler to the list. The handler first finds which item was selected (using
the
renderer property of the event) and accesses its data item (that is, the JavaScript object returned by
the Flickr query and that describes the photo). The item contains a description property that is an HTML fragment,
so it is really easy to populate the details view by setting the innerHTML property of the photoDetails div to
this description. We only change it slightly so that the anchors contained in the description open a separate window
instead of replacing our page.
Then, the important call is vs.show(detailsView). The vs variable is our d-view-stack widget,
and it has a show function that makes one of its children visible. By default, the new view will be shown using a
slide transition, so that's OK for us.
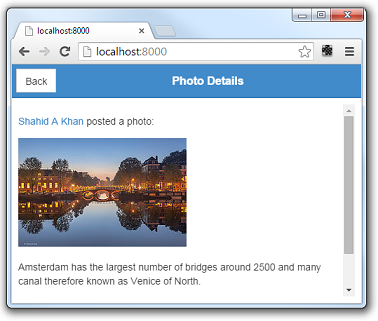
We also want to be able to go back from the details view to the list view, and we added a Back button in the header for this. let's just add an event handler in the markup to do this:
<button is="d-button" onclick="vs.show(listView, {reverse:true})">Back</button>
We are done, you can try that new feature and click on an item to see the details view:
Run the Demo
Click here to see the live demo: Deliteful Tutorial - Part 6
Next Step
In the next step we will complete our small app by customizing the side pane to implement a settings view.