
Tutorial details
In this tutorial you'll learn some of the more fundamental concepts of delite.
Going back to basics
As shown in the introduction tutorial example, Templating support is provided 'out of the box' with delite and straightforward to implement.
We'll now look at an example which doesn't use templating; this would not be a normal use case but it's worth showing to explore some of
the fundamentals of a delite custom element.
create the scaffold
Again we'll use the generator-delite-element Yeoman generator.
Create a new directory somewhere (named title-package, which will also be our package name) and change directory to it using the commands :
mkdir -p title-package
cd title-package
Run Yeoman to create our scaffold
yo delite-element
You'll be prompted to enter the widget package name & the name of the custom widget element, enter the following choices shown in brackets below.
? What is the name of your delite widget element package? (title-package)
? What do you want to call your delite widget element (must contain a dash)? (title-widget)
? Would you like your delite element to be built on a template? (n)
? Would you like your delite element to providing theming capabilities? (n)
? Will your delite element require string internationalization? (n)
? Will your delite element require pointer management? (n)
? Do you want to use build version of delite package (instead of source version)? (n)
What's been generated
Yeoman created the following (as shown in the console output):
We've created a new package named title-package for new widgets that we'll create.
./TitleWidget.js- this is our widget module./TitleWidget/css/TitleWidget.css- this is our widget css./samples/TitleWidget.html- this is a sample how to use our new widget
This is the most basic setup for a widget/custom component. You can view the sample generated HTML ./samples/TitleWidget.html
in a browser to see what's been created.
Click here to see the live demo: Delite Basics Tutorial - Part 1
A look at the widget lifecycle methods for our simple widget
If we look at our custom element module ./TitleWidget.js we can see two methods have been created for us, render and refreshRendering.
render is the simplest of lifecycle
methods we need to create our widget.
render
We normally wouldn't create a render method because typically we'd be using templates to create the widget UI (which was shown earlier
on) but because we aren't using a template we need to implement render ourselves.
In this render method we're adding <span>title</span> and <h1></h1> elements to our widget as well as assigning a property
to the widget named _h1 i.e. via this.appendChild(this._h = this.ownerDocument.createElement("h1")); which we can use to update
it programmatically or set it declaratively.
In comparison to the previous templated widget you see it obviously requires much more work.
refreshRendering
refreshRendering is also a lifecycle method but implemented in decor/Invalidating, which delite/Widget inherits from.
Its purpose is to observe changes to properties defined on the widget and update the UI. In your web browser developer tools, if
you place a breakpoint in that method and then click the "click to change title" button, you'll see this method is called
(because the button adds inline JavaScript to update the element's value property i.e.
onclick="element.value='New Title'; event.target.disabled=true").
If we wanted to see what the old value was (and also display it to the DOM) we can change this method in ./TitleWidget.js from
refreshRendering: function (props) {
    // if the value change update the display
    if ("value" in props) {
        this._h.innerHTML = this.value;
    }
}
to the following:
refreshRendering: function (props) {
// if the value change update the display
if ("value" in props) {
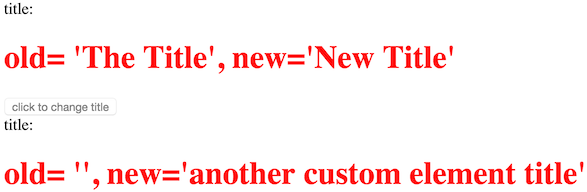
this._h.innerText = "old= '" + props["value"] + "', new='" + this.value + "'";
}
}
Also let's update the ./samples/TitleWidget.html JavaScript from:
require(["title-package/TitleWidget"], function (TitleWidget) {

});
to add a programmatically created widget:
require(["title-package/TitleWidget"], function (TitleWidget) {
    var anotherTitleWidget = new TitleWidget({value : 'another custom element title'});
    anotherTitleWidget.placeAt(document.body, 'last');
});
Click here to see the live demo: Delite Basics Tutorial - Part 2
If not already set, set a breakpoint (via your JavaScript debugger) to the refreshRendering method of our custom element module ./TitleWidget.js and
reload the page.
Notice when you first load the page, this method will be called for each widget, you'll also see that the value property of our widget is
contained in the props argument of this method.
This is because we're setting the value property on the declaratively written widget to value="The Title" and setting the value property
on the programmatically written widget to value : "another custom element title".
If you don't set the value property of the widget at construction time, the value property of our widget is NOT contained in the props argument.
Click the 'click to change title button' and the widget will render like:
If you still have a breakpoint set in refreshRendering you will see again that the value property of our widget is again contained in the props
argument.
Update the value property of ./TitleWidget.js to:
value: "The Title",
And reload the page. Notice again the value property of our widget is NOT contained in the props argument. This is because the property value hasn't changed.
The decor/Invalidating documentation explains this behaviour.
Click here to see the live demo: Delite Basics Tutorial - Part 3
Round up
As you've seen, the basics of delite are very easy when building a custom element, keeping in mind we've only touched on some of the capabilities of this project.
We've also touched on some lower level concerns of delite.
We'll expand on this in future and discuss more advanced topics in a later tutorial.